Do you want to know how to install a CTA structure in a Citroën Jumper van, like ours, or maybe in one of its counterparts: Fiat Ducato or Peugeot Boxer? Read on and find out step by step how we did it. With our photos you will be able to see in detail how the structure is installed so that you can put it without any problem
1. Is the CTA structure approved for your vehicle?
The first thing you should do before buying the CTA structure or any other, is to check with your engineer if this structure is approved for installation in your van. This is very important to make the increase of seats and the legalization of the whole camperization.
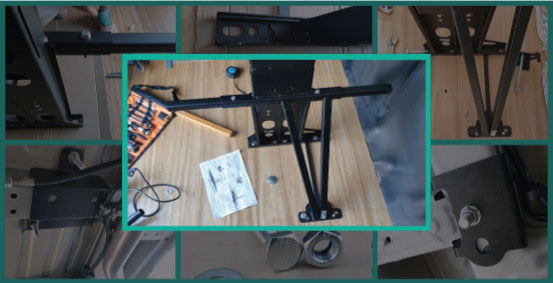
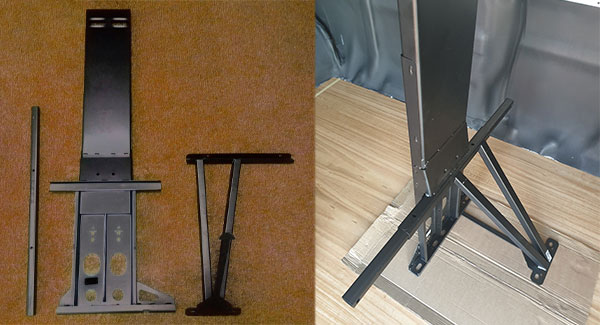
2. Assemble the main structure
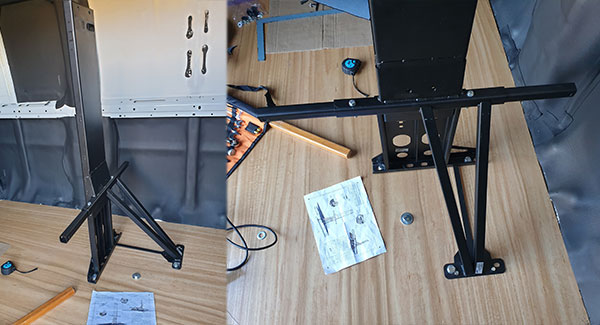
The structure itself consists of the 3 main pieces that you can see on the left, in the image below. These 3 pieces will have to fit together so that the structure looks like the one in the picture on the right.
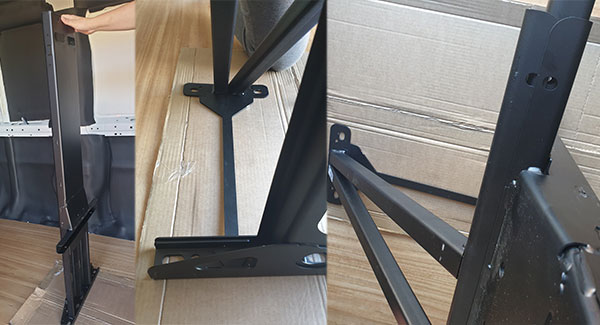
In the following pictures we show you in more detail how the pieces fit together.
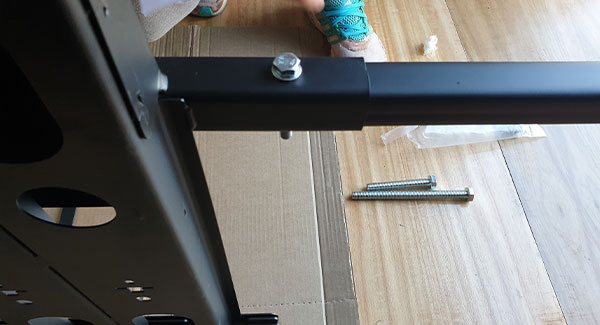
Then you will have to anchor the parts with a couple of bolts, washers and nuts as shown below:
3. Drill the holes to anchor the CTA structure to the underbody of the van
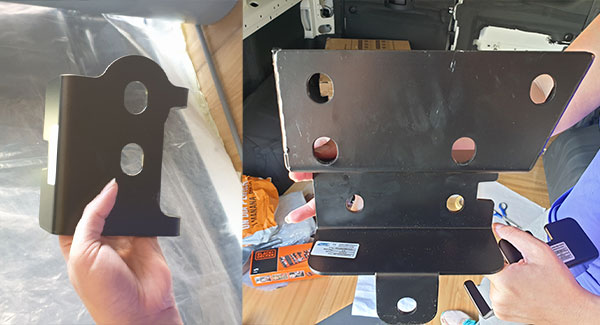
The installation kit also includes 2 metal parts that will be in charge of anchoring the structure in place. In the following image you can see which ones we are referring to.
The good, and bad, thing about this structure is that it has only one installation position on each cross member of the van frame. To get the installation position, we did the following:
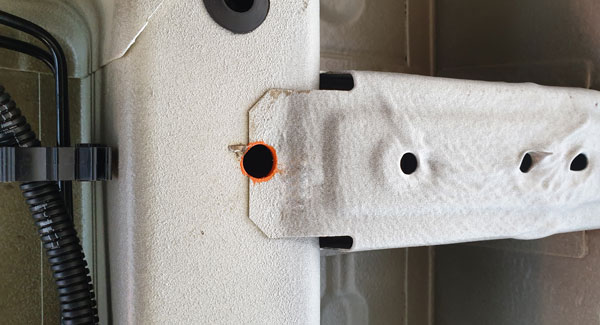
- First, we present in place the small piece, the one on the left in the image above. This would be at the intersection of the left chassis cross member with a short 🤔 beam 🤔 that runs to the outside of the van, just behind the cross member that is at the height of the sliding door. You probably didn’t understand anything and remained the same as at the beginning? 😅 It’s a bit of a mess to explain and understand, so as a picture is worth a thousand words, in these photos you can see better where we put it.
- When we had it well placed, we marked with a marker pen the place where the screw would have to go.
- We made the hole with the drill from the bottom to the top. You have to drill 2 plates, the one on the crossbar and the one on the floor, so make sure you have the drill perpendicular so that the holes are straight.
- Paint the holes with anti-rust paint to protect the cut edges from rust.
At this point you should have something similar to this:
- We align the hole in the frame that is marked with the red circle in the photo with the hole we just made.
- We mark with a marker pen the holes marked with a green circle. For now we forget about the hole marked in blue.
- We drill the two “green” holes.
- At this point we needed to get the exact location of the hole marked in blue. To mark it, we put the structure in place, adjusting all the holes and went back under the van with the large anchor piece. We put it in place, squaring the hole we had already made (green), and marked it (blue). In this later photo you can see how we fit this piece.
- We drilled a hole from below with a fine drill bit right in the center of the mark and then we made the final hole from above.
3. Screw the CTA structure
We already have all the holes drilled! So it’s time to screw… To begin to fix the structure we proceeded to put it back in place, making sure that all the holes fit. Once it was in place, we continued as follows:
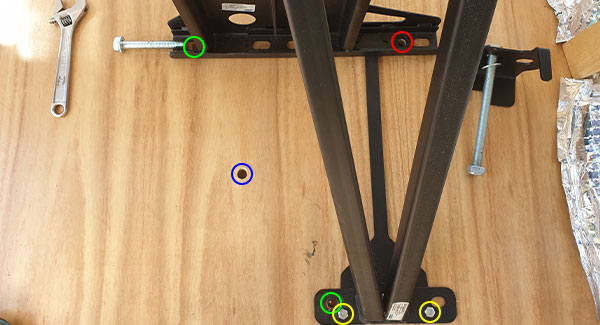
- We screwed the structure to the wood, with the 2 wood screws included in the kit, through the small holes that are marked with the yellow circles in the previous image.
- We put the appropriate screw, with its respective washer, in each of the 4 holes we made. The longest screw is the one that goes in the first one, the one marked with the red circle.
To continue screwing the base, 2 people are needed, so if you are doing the camperization alone, you will need to get someone to help you.
- One person has to stay on top with a wrench and another one has to get under the van with another wrench, the anchoring pieces, the washers and the nuts. And between the two of them, each screw has to be tightened. You have to be patient because, due to the position, the self-locking nuts and the length of the screws, it is a tedious task.
If you want, for greater security, add screw glue before putting the nuts on.
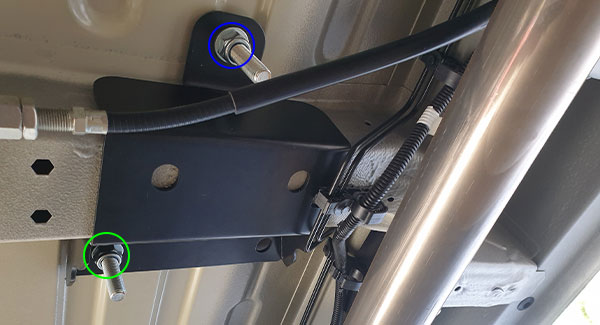
In the following image you can see how we placed the small anchor piece:
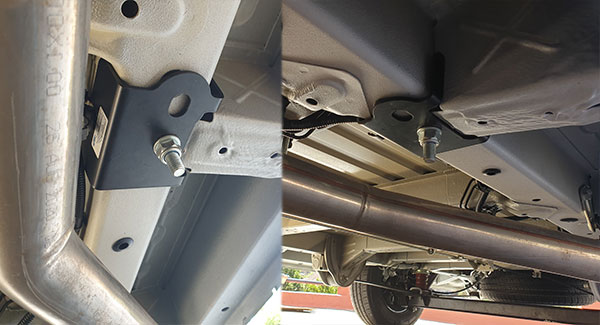
In this other one you can see the placement of the larger piece and the location of the screw at the front of the structure.
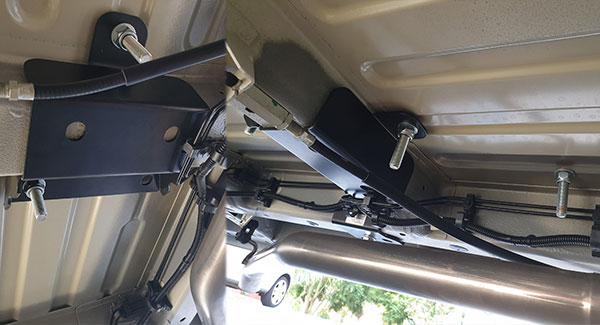
At this point you should have something similar to this:
4. Place the seat belts
Now it only remains to place the seat belts. This step is quite simple, just screw each belt at 3 points and pass the belt itself inside the central vertical part of the structure.
Remember that this type of structure must be installed by a qualified professional.