
Surely installing the windows is one of the most frightening processes for a non-professional camper: Having to cut the van’s sheet metal almost at the beginning of the whole process… 😰 Whoever says they didn’t get scared with the first cut is lying! 😅 But don’t worry, with our help you will see that it’s not so bad and you can proudly say: I installed these windows! Do you dare?
Steps to install a window in our future camper
let’s get down to business! To make it clear the whole process of installing your window, we have broken it down into simple steps. It doesn’t matter if the window is sliding, casement or porthole. Follow the steps, have confidence in yourself and in no time you’ll be showing off your new window. In addition, at the end of the article you will also find how to install a blackout or insect screen.
1. Make a template of the window opening
Before you start cutting into the sheet metal, it is a good idea to make a cardboard template with the outline of the hole. Read the instructions for the window and find out what measurements the hole should have. The template will help us to mark on the sheet, in a simple way, the hole to be cut.
It is possible that some windows include a ready-made paper template. If so, perfect! That time you save…. 😁
To place the template keep in mind that you will have to leave a margin around the hole to place the slats that will make the wall and that later will have to be placed.
2. Present the template inside the van
It is very important that before placing the template you think about the following questions:
- do you want the window to be centered with respect to some interior element (the kitchen, the bed, etc)?
- do you want the window to be centered with respect to exterior elements of the van?
Once you have decided where to place it, you will have to make sure that it is straight. To do this, the easiest way is to fix the template, with masking tape, in the center of the point where you want to install it and then adjust it. To do this, measure the distance between the template and the upper or lower guides of the body.
do not use a level unless the van is also level! This is a mistake that has happened to some users.
This step is VERY important, so take all the time you need. Imagine how the window will look once it is installed and visualize how you will use it.
Once you have fixed the template well, mark with a marker pen all around it.
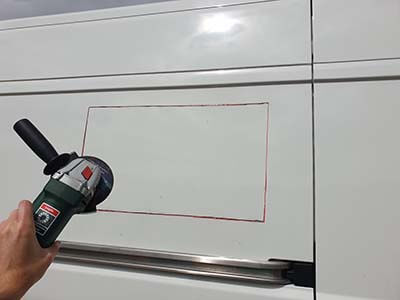
3. Transfer the template to the outside of the van
Once you have the template fitted and marked on the inside, you will need to move that drawing to the outside. You may be asking yourself one of two questions:
Why not just mark the window directly on the outside?
We wanted to do it this way to make sure that the window was exactly where we wanted it to be from the inside. If this doesn’t concern you, you can mark the hole directly from the outside.
Why not cut directly from the inside of the van?
By cutting the sheet metal from the inside out, the cut, seen from the outside, is much less clean, even with the paint lifted. The most important side, in this case, is the outside. It is best to make the cut so that it looks better on the outside, so it is also necessary to cut from the outside.
In the following image you can see the sheet metal of the van from the outside. Cut 1 was made from the outside, while cut 2 was made from the inside.
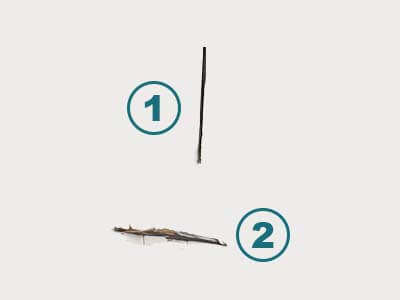
: Cutting the sheet metal from the inside to the outside
To transfer the drawing to the outside, we did the following:
- With the template well stuck with the masking tape, we used a drill with a fine metal drill bit to make three holes in different places on the template, better not to make them too close to the edge.
- Once the holes are made, we remove the masking tape and take the template to the outside.
- Then we placed the template on the outside of the van. Thanks to the holes we were able to square it nicely in place. We simply aligned the holes in the template with the holes in the sheet metal using some wires. Note that you have to turn the cardboard over, the side that used to be glued to the sheet metal will now be the visible side.
- Glue the cardboard to the sheet with masking tape. Make sure it is straight.
- Once we had the template in place we mark the silhouette with a marker pen.
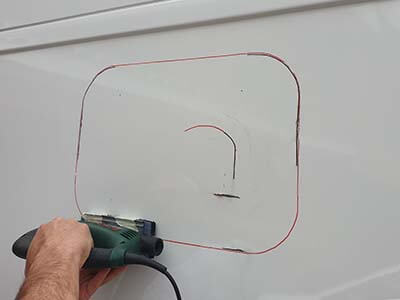
4. Cut the sheet with a radial or a jigsaw
now the fun begins! 😁. After doing several tests and different cuts, as best results we got was as follows:
- For straight cuts: With a radial saw with a thin metal disc. Clean cuts are obtained easily and quickly.
- For curved cuts: With a jigsaw with a metal blade, if you have a special blade for curves it would be perfect.
What to consider before cutting the sheet metal of a van?
- If the cuts are made too slowly with the radial saw, the sheet metal will heat up and the paint will lift. To avoid this happening, try to keep your speed “light”, don’t leave the radial too long in the same place and let the sheet metal cool down from time to time.
- If the day is very hot and it is very sunny, keep in mind that the sheet metal will have a harder time cooling down, so you will have to be more careful with the paint. If you have experience with the radial saw, you will probably not have any problem since you will make the cut quickly. If, on the other hand, you do not have much experience with the radial, making small cuts, changing places, stopping at times to let the sheet cool or making the cuts first thing in the morning will help you to have better results.
- If you have to make a cut in a place where you already have the insulation in place, it will probably cost you a little more. For example, with one of the windows we already had the Kaiflex glued to the sheet metal. When making the cuts we noticed that the radial cutter did not cut as smoothly as it did with the other windows, it was slower and, in addition, the sheet metal got much hotter. So you have to be extra careful.
- If you have to make curved cuts with a jigsaw, as in the image below, we recommend making the curved cuts first, so that the surface will hold longer. With one of the windows, we made the mistake of also cutting the straight sides and lost a lot of stability.
- The skid of the jigsaw can scratch the paint, so protect the surface well or cover the skid to avoid it. We used two pieces of kaiflex 🤣. You can also cover the entire contour with masking tape.
- It may seem silly, but make sure you don’t make the hole too big. Measure 3 times cut 1.
- Apply as many safety measures as you can. There is always a risk involved in using this type of tool.
Before finishing cutting the whole silhouette, fasten with masking tape across the inside of the window to prevent the sheet metal from falling and scratching the floor of the vehicle.
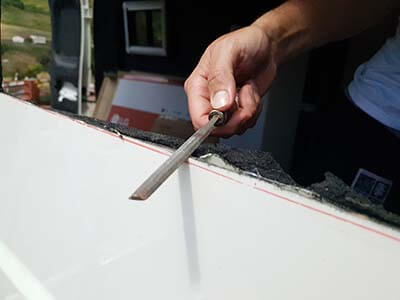
5. File the edge of the cut sheet metal to remove the burr
Use a metal file to remove the excess on the edges of the cut sheet metal and round off the cut surfaces of the frame.
Do not leave sharp cuts that could scratch the window.
If the cut is not flush with the line, as in the picture, don’t worry! Use a file or a radial saw with a rabbeting disc and carefully perfect the cut.
6. Present the window (sliding, casement or porthole) in the hole
At this point, it’s time to cross your fingers 🤞 and see if the window fits in the hole. If it doesn’t fit the first time, don’t worry. See where the sheet metal is rubbing and repeat the previous two points until the window fits.
Make sure the hole is straight.
Once you check that it fits, remove it again.
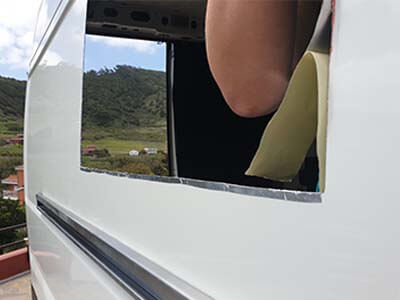
7. Clean the area with rubbing alcohol or rubbing alcohol
Clean the outer edge of the hole with rubbing alcohol to remove all the filing and dirt that may be present.
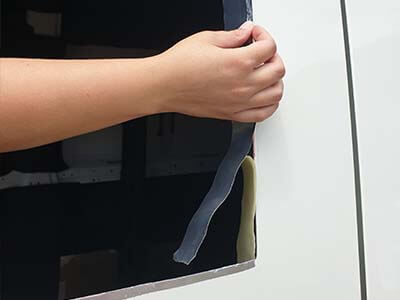
8. Protect the surface of the cut edge of the sheet metal
We decided to cover the entire cut with adhesive aluminum tape to protect the cut sheet metal from rusting. This can also be achieved with rust resistant paint. As we did not want to wait for the drying time, we opted for aluminum tape.
Be careful not to get the tape, or the paint, too thick on the outside, as it might show once you put the window in.
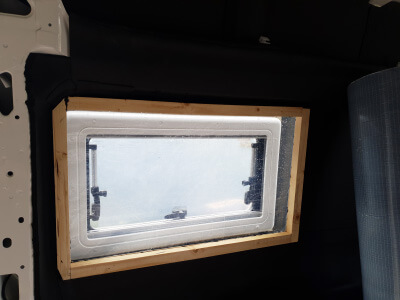
9. Cut the slats that will make the wall
Each window manufacturer and model has its own installation instructions, so read them very well before starting the whole process. One of the important things to look for in the instructions is the minimum wall thickness the window needs. You will need to build a frame with wooden slats that simulate a wall. A suitable slat is usually around 3cm wide.
Take the measurements of the opening, cut the 4 strips and apply wood treatment to them.
It is possible that the veneer, where the wood panel will go, has some curve or coincides with some element of the veneer that interferes with its placement. If this is your case, simply adapt the wood strips to fit.
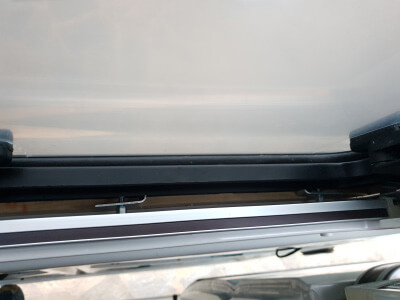
10. Put the frame in place
Apply some mounting glue to the slats and glue them in place. Clamp them in place with clamps or a pair of clamps. Wait for the drying time and check that they are securely glued to the veneer.
11. Present the window
At this point it is crucial to reposition the window in order to make sure that the opening is still ready to incorporate our window and its accessories.
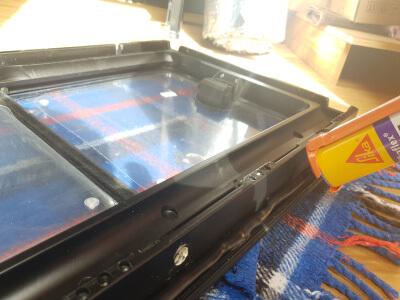
12. Apply plenty of glue to the window frame itself
Apply a suitable glue all over the inside frame of the window. We use Sikaflex, but it would be best to use butyl if possible. It is very important that the window is well sealed to avoid leaks and that it is well waterproofed.
13. Place the window in the opening
Hold the window securely, being careful not to stain yourself, and with the help of someone inside the van, put the window in place
When positioning the window, apply a little pressure so that it is perfectly in place.
14. Place the inner frame of the window
At this point you will need to follow the manufacturer’s installation instructions, as each window model will be different.
14.1 Carbest RW Motion sliding window
These windows include an inner frame that must be installed from the inside of the van using screws. The screws are inserted from the frame and screwed into the window so that the frame is supported by the wood slats
14.2 Carbest casement window (Dometic S4 replica)
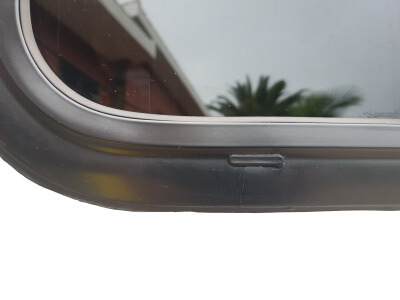
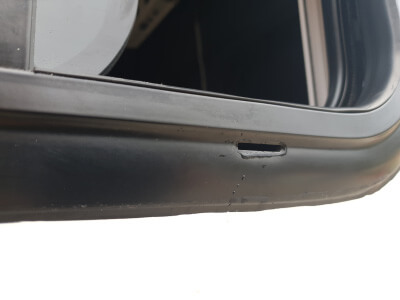
In this case the frame has L’s, as shown in the picture, which have to be adjusted to be fully fastened. The L’s have a built-in nut that must be turned to adjust them, depending on the size between the frame and the inside of the window.
If you leave any L’s loose, with the vibrations they will make an annoying noise, so adjust them well from the beginning.
15. Attach accessories
The Carbest Motion RW windows come with a black rubber strap to attach to hide the screws on the inner frame. The installation is very simple, just squeeze the ends of the tape and insert it through the inner rail that comes in the window frame.
16. Seal the entire exterior frame of the window
To avoid leaks, it is good to seal the outer frame of the window with sikaflex or other similar sealant.
- First of all, so as not to stain the bodywork more than necessary, cover with masking tape all around where you don’t want the sealant to reach.
- Apply a thin, even bead of sealant around the entire outer frame of the window to cover possible water ingress. Don’t worry if it’s not quite right.
- Prepare a small cup of water and a splash of dishwashing soap. Wet the index finger of your good hand and run your finger all around the window, removing excess sealant and covering any unsealed gaps.

- When you have removed all the excess sealant, remove the masking tape and clean up any remaining Sika residue. To remove them easily you can use a napkin dipped in soapy water. If any residue resists use a little WD-40 oil, but be careful not to apply it on the sealant that is well placed.
17. Remove the plugs from the window overflows
The windows have water holes to eliminate the water that ends up in the gutter. Just remove the rubber plugs from the holes at the bottom of the outer frame of the window. The ones at the top of the window should be left in place.
If you follow these steps you will be 👏👏👏👏 Congratulations! 👏👏👏👏👏 and you can now have your window installed. In the end it didn’t turn out to be that difficult, you just have to follow the instructions, do things calmly and patiently and keep in mind a few details.
Installing a blackout and insect screen
One of the most important accessories of our windows are the blackout and the mosquito net. There are windows that have it built into the interior frame and others, such as the Carbest RW motion that have it as an added accessory.
Its assembly is simple, follow the instructions in the manufacturer’s manual. Here are some tips that may help you:
- Before tightening the screws all the way, make sure everything is straight and well aligned with the edges of the window. The blackout/mosquito screen tends to slip a bit when you put it on, which makes it a little tricky to get it straight and aligned right the first time.
- Do not tighten the screws as far as they will go, as then the blackout and/or screen will not go down and up comfortably.
- Although all the slats on which you are going to place the blackout/mosquito screen have the same width, if when placing the blackout/mosquito screen it does not fit flush with all the slats, pass a fine sandpaper over those slats on which it is glued to get a better finish.
How much does it cost to install a window in a motorhome or camper van?
In Mejor en Furgo Camper we are supporters of DIY (Do It Yourselft) but it is not always easy to do the projects ourselves. Therefore, we will differentiate between the cost of installing the windows if we do it ourselves and how much it would cost to have them installed by a professional.
How much does it cost to install a window ourselves? What do we need?
This is a short list of consumables and small tools that you need to have to install a single window:
WINDOW INSTALLATION MATERIALS (DIY)
| PRICE | |
|---|---|
| Sikaflex → | 7.49 $ ✓ |
| Wooden lath 32x32x240 → | 3.20 $ ✓ |
| Aluminum tape → | 5.99 $ ✓ |
| Masking or painter’s tape → | 1.79 $ ✓ |
| X2 Pack 4 Clamp Clamps → | 6.58 $ ✓ |
| Thin metal disc for radial cutter → | 0.75 $ ✓ |
| TOTAL | 25.8 $ |
Most of the items will be useful for installing more than one window. For example, to install 4 windows you will only need to buy more wooden slats and if you want to go faster another pair of clamps.
On the other hand, the cost of the window, like everything else, depends on many factors:
- Dimensions.
- Type.
- Brand, etc.
To give you an idea of how much it can cost, we leave you a list with the price of the windows that we installed in our van. As you will see they are very varied so maybe it will help you to solve your doubts.
WINDOWS
| PRICE | |
|---|---|
| Carbest RW motion 50×35 + blackout with insect screen for RW Motion 50×35 → | 196.5 $ ✓ |
| Carbest RW motion 80×45 → | 164 $ ✓ |
| Darkening device with mosquito net for RW Motion 80×45 → | 81.92 $ ✓ |
| Carbest folding replica of the S4 70×40 with blackout and insect screen → | 254 $ ✓ |
| Dometic S4 sliding 70×40 with blackout and mosquito screen → | 429.7 $ ✓ |
| AVERAGE PRICE PER WINDOW | 281.53 $ |
The cost of materials to install a window in our camper van is: 281.53 + 25.8 = 307,33$, approximately. Obviously this is a guide price, since the bulk of the cost is for the window.
In addition, we have not included the price of some tools, such as the radial saw, the jig saw or the files, since it is possible that some of them you already have at home or you can borrow them from someone you know. If not, read on and we’ll show you what tools you’ll need and how much they might cost.
Tools needed to install a camper window
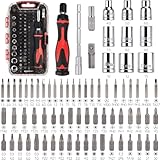
The main tools you will need are the following:
- A radial saw.
- A jigsaw (if you need to make curved cuts).
- A metal file.
- A gun to apply silicones and cold sealants.
- Screwdrivers.
These tools are needed at many different stages of van camperization, not just for installing windows. They tend to be common and practically indispensable tools in our garage. So you may be interested in having them.


If you don’t want to buy them or you don’t have anyone you know who likes DIY, you may be interested to know that there are hardware stores that rent tools of all kinds. This option can be attractive if you are going to use a tool very punctually, if not, it may end up being more expensive than if you had bought it.
If we add the cost of some tools oriented to a casual user and not professional, the cost would be about 111.88 Euros. Obviously this price can skyrocket a lot if you prefer professional tools.
There are other expenses of things that we normally have at home, that we are not going to include in the budget but that have their importance in the installation process. For example: fairy or alcohol.
That is to say, if we add up all the costs we can conclude that the window installation would have an approximate cost of:
APPROXIMATE TOTAL COST – WINDOW INSTALLATION
| PRICE | |
|---|---|
| Materials required → | 25.8 $ ✓ |
| Window (average estimate) → | 281.53 $ ✓ |
| Machinery (you may have them) → | 111.88 $ ✓ |
| TOTAL | 419.21 $ |
This is not the installation price per window, but for a single window. In the list there are shared costs that, in case you want to install more than one window, you will only have to do them once.
How much does it cost to have a professional install a window?
The price of the installation of a window by a professional will depend a lot on the workshop that does the work, but the price per hour can go from 25 or 30 euros to 90 or more.
Does the installation of a window always have to be approved?
when installing a window will you need a certificate of installation, an engineer to draw up a project and pass the itv? In principle and taking into account what our engineer has told us, it will depend on each case. To make it a little clearer we will put different situations:
Case 1: You have a van and you want to add a window
If you do not have any previous hole where you can place the window, you will have to go through a homologation process.
2 Case – You want to change the type of your window, for example remove a casement and put a sliding one
In theory, and from what we have been told, changing a window for another that has the same dimensions, in principle will not affect the approval previously made, it does not require a new project. In any case, consult an engineer to be sure.
3 Case – I want to change my window for another one with bigger dimensions
If you have an approved window and you want to change it for a bigger one, you have to check first if they gave you the measurements of the window in the approval, because they do not always do it. If they did, you will have to go through another homologation. In any case, consult an engineer to be sure.
Find out how much it costs to have an approval project done in your area, a simple project can cost around 300 euros.
Do you need a window installation manual in pdf?
Here are some manuals of the windows that are most commonly used in camperizations. If you miss any model or any link does not work, do not hesitate to put it in comments so we can update the information.
- Dometic S4 window user manual pdf: Dometic S4 manual pdf
- Dometic S4 window installation manual pdf: Dometic S4 pdf figures
- If you want to view the manuals for any Dometic product, you can do it here: Dometic Manuals
- CARBEST RW MOTION window manual pdf: CARBEST RW MOTION pdf
Frequently asked questions about camper window installation
The installation of windows can be a complex process if you don’t have enough information. If we add to that the fact that it is one of the first things you have to venture into when you start to camperize, it is normal that many doubts arise. In this article we have tried to answer those we have encountered the most problems with, but there are some very specific ones that we have been asked to clarify:
Installing a window is not a very laborious process but there are details that will take a lot of time such as letting the sika on the slats dry, measurements, etc. In our experience the average time is 3 and a half hours, taking into account that the sika should be left to dry for two hours. If you are a professional you will be able to reduce this time.